Skip to content


Summary Highlights
| Wondering how to stain a deck for summer? This ultimate DIY guide walks you through every step—from pressure washing and sanding the wood grain to choosing the right wood stain and applying it with a paintbrush or roller. Learn how to prepare your deck, seal the surface, and protect nearby windows, siding, and floor using plastic sheeting. We cover key tools like respirators, bristle brushes, and sealants, plus tips on removing old stain, refinishing faded boards, and preventing stain splatter on vinyl siding. Whether you’re painting a porch or sealing a wood deck, this guide helps transform your outdoor space with lasting results. |
Staining your deck in summer isn’t just about aesthetics—it’s a vital part of protecting your outdoor investment. With hot sun, high foot traffic, and increased use during the warmer months, a well-stained deck resists damage while looking polished and inviting. But to do it right, you’ll need more than just a bucket of stain.
This guide will walk you through everything from prep to maintenance, so you’ll know exactly how to stain your deck and enjoy it all season long. Let’s take a look now and learn how to restore your deck the right way this summer!
Why Summer Is the Best Time to Stain Your Deck

Summer offers ideal staining conditions, characterized by warm temperatures, lower humidity, and extended daylight hours. These elements help deck stains cure adequately and bond to the wood surface for long-lasting protection. Plus, summer is when you’ll use your deck the most—so why not make it look its best? If you learn how to stain a deck now, you can enjoy the benefits all season.
Tools & Materials for Summer Deck Staining
To achieve the best results for your summer deck staining project, you’ll need to gather some essential tools and materials:
Choose a UV-Resistant Deck Stain
UV-resistant stain protects wood from sun damage, preventing fading and cracking. A deck staining expert can help you pick the best formula for your wood type and climate. This investment not only enhances your deck’s appearance but also extends its lifespan, ensuring countless summer gatherings.
Applicators: Brushes, Rollers, or Sprayers
Selecting the right applicator is essential for a smooth and even finish when staining your deck. Brushes allow detailed work around railings. Rollers are great for speed, while sprayers offer a fast, even coat but require careful technique. For deck repair and restoration jobs, brushes often provide the most control.
Deck Cleaner and Power Washer
Prep is key. Use a quality deck cleaner to remove mildew, dirt, and algae. Follow up with a power washer or garden hose with a high-pressure nozzle. Let everything dry completely before staining. Proper preparation will make a significant difference in the final result of your deck staining project.
Drop Cloths, Painter’s Tape, and Protective Gear
To ensure a smooth and mess-free staining process, gather the essential tools, including drop cloths, painter’s tape, and protective gear. Drop cloths protect nearby surfaces. Painter’s tape helps with clean lines. Don safety gear to avoid fumes and splashes during cleaning or staining.
Step-by-Step Summer Deck Staining Guide
Now that you have your tools ready, it’s time to begin staining your deck. Follow these steps to make sure your deck looks great and lasts through the summer heat:
Step 1 – Inspect and Repair Boards After Winter
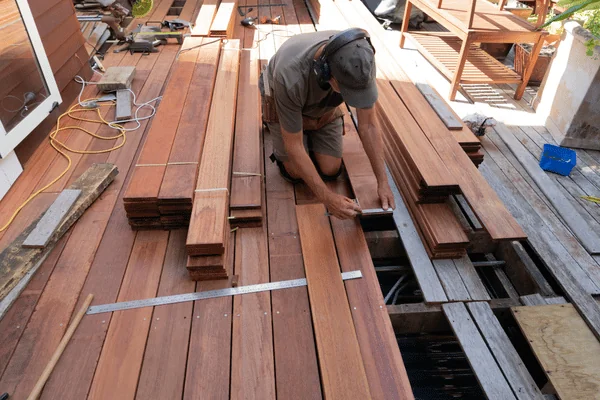
Before staining, examine your deck for damaged or warped boards. Look for signs of water damage. Replace anything unsafe or badly worn. Tighten loose screws and nails. This step ensures your stain job lasts longer and applies evenly.
Step 2 – Clean the Deck Thoroughly
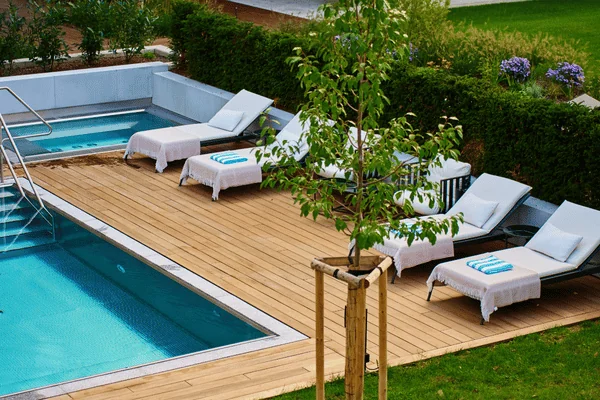
A clean surface permits better adhesion of the stain and enhances its longevity. For your swimming pool deck, focus on:
- Removing dirt and debris
- Power washing to eliminate mold or mildew
- Using a deck cleaner for stubborn stains
Step 3 – Let It Dry in the Summer Sun
After you’ve cleaned your deck thoroughly, it’s time to let it dry in the summer sun. Never stain a damp deck. Allow the surface to dry for at least 24–48 hours, depending on the humidity level. This provides better stain penetration and a smoother finish.
Step 4 – Sand for a Smooth Surface
This process smooths out any imperfections and guarantees better stain absorption. Here’s what you need to do:
- Use a power sander or sanding block for efficiency.
- Start with coarse grit and finish with fine grit.
- Clean the dust thoroughly before staining.
Step 5 – Apply the Right Stain for Summer Durability
With a smooth surface ready for staining, it’s time to select the right stain that can withstand the summer elements. Here’s how to apply deck stain:
- Stir the stain thoroughly
- Start in a corner and work in sections
- Use long, even strokes with a brush or roller
- Apply in thin layers
- Wipe away drips and excess as you go
For solid coverage, use two thin coats rather than one thick coat. Allow the first coat to dry completely before applying another.
Step 6 – Let the Stain Dry Before Hosting BBQs and Parties
Once you’ve applied the stain, patience is key. Even if it feels dry, let your deck cure thoroughly before placing furniture or entertaining. Dry times vary by product, but 24–72 hours is typical.
Staining Poolside & High-Traffic Summer Areas
When learning how to stain deck surfaces in poolside and high-traffic areas, it’s essential to choose the right products for durability, water resistance, and safety.
Choose Water-Resistant & Slip-Proof Stains
Choosing the right stain for your deck is key, especially in high-traffic areas like poolside or patios, where water and foot traffic can create slippery conditions. Opt for water-resistant and slip-resistant stains to maximize safety and durability.
Consider Heat-Resistant Finishes
Some stains can get hot under direct sunlight. Select formulas labeled as heat-resistant for decks exposed to direct sunlight.
Best Products for Chlorine-Exposed Decks
Staining your deck in poolside areas requires careful consideration, especially since chlorine can damage wood finishes. Here are some recommendations:
- Waterproof sealers for added protection
- Chlorine-resistant stains that withstand harsh chemicals
- UV-blocking finishes to prevent fading
Common Summer Deck Staining Mistakes
When wondering how to stain your deck this summer, it’s easy to make some common mistakes that can ruin your hard work:
Staining Under Direct, Harsh Sun
Although summer days might seem perfect for deck staining, working under direct, harsh sun can lead to significant mistakes. To avoid these issues, consider the following:
- Stain in the early morning or late afternoon
- Use a roller or brush for even coverage
- Keep the surface cool with water
Not Checking the Weather Forecast for Rain
Have you ever stained your deck only to be surprised by unexpected rain? Rain within 24–48 hours of staining can ruin your work. Always check the forecast before starting.
Rushing the Drying Time for Events
Unexpected rain isn’t the only thing that can sabotage your deck staining project. Rushing the drying time can lead to uneven finishes and peeling. Keep these tips in mind:
- Avoid high-humidity days
- Don’t use fast-drying products
- Allow adequate drying time between coats
When to Call a Deck Staining Expert This Summer
Wondering when it’s best to call in an expert this summer? If your deck is old, has complex repairs, or you’re unsure about the right stain, calling a local deck builder to do an inspection is a wise choice. They can handle deck repair and restoration with the right tools, ensuring a professional finish that lasts.

Maintaining Your Deck Throughout Summer
Keep your freshly stained deck in top shape with simple upkeep:
Weekly Sweeps and Quick Washes
Regular maintenance helps prevent dirt buildup and keeps your space inviting. Incorporate these quick tasks into your weekly routine:
- Sweep the surface to remove debris
- Use a gentle wash with soap and water
- Rinse with a hose for a fresh look
Spot Treatments for Spills and Stains
Even with regular sweeps and washes, spills and stains can happen, especially during summer gatherings. For quick spot treatments, immediately blot the area with a clean cloth to absorb excess liquid. For tougher stains, mix mild soap with water and scrub gently. Rinse thoroughly with water afterward. Don’t forget to let the area dry completely before applying any additional stain or sealant.
Covering Furniture Legs to Prevent Scratches
One straightforward way to maintain your deck throughout the summer is by covering furniture legs to prevent scratches. This is especially important if you frequently move your outdoor furniture. Here are some effective options for protecting your deck:
- Felt pads
- Rubber caps
- Furniture coasters
Get Your Deck Summer-Ready Today
Now that you know how to stain a deck properly, you’re ready to transform your outdoor space. From careful prep to smart maintenance, every step contributes to a better, longer-lasting result. Whether it’s around a swimming pool or your backyard patio, staining adds protection, value, and curb appeal.
Don’t wait—make your deck shine this summer. Contact our local deck staining experts for a free consultation and quote.
Frequently Asked Questions
How do I choose the right stain color for my deck?
Choosing the right stain color depends on the style of your home, your taste, and the overall look you’re aiming for. Always test a few swatches on your deck to see how they look in natural light throughout the day. Remember—darker stains hide wear better, while lighter shades can brighten a space.
Can I use a paint roller for deck staining?
Yes, paint rollers can be a great choice for staining a deck, especially for large, flat surfaces. Use a roller with the right nap length based on your deck’s texture. You’ll still want to use a brush to get into cracks, corners, and railings. For the best finish, apply stain evenly and back-brush when necessary to prevent lap marks. Rollers save time, but don’t skip the details.
What are the benefits of oil-based vs water-based stains?
Oil-based stains offer deeper wood penetration and longer-lasting protection, making them great for high-traffic or exposed decks. They tend to bring out the wood’s natural character but take longer to dry. Water-based stains dry faster, have less odor, and are easier to clean up—ideal if you’re short on time or working in a more controlled climate.
How can I tell if my deck needs staining?
There are a few easy ways to check. Pour a small amount of water on the surface—if it soaks in instead of beading up, the wood is unprotected. Fading, graying, or splintering boards are also signs your deck needs attention. Regular inspections help you catch issues before they become major repair jobs.
What temperature is best for staining a deck?
The ideal temperature range for staining is between 50°F and 90°F. Avoid direct sunlight and high humidity, as these conditions can cause the stain to dry too quickly or unevenly. Early morning or late afternoon is usually the best time to apply stain during summer. Always check the weather forecast, especially for rain, before you begin.
How soon can I walk on my deck after staining?
It’s best to wait at least 24–48 hours before walking on your freshly stained deck. High temperatures may speed up the drying time, but always refer to the stain manufacturer’s instructions. Walking on it too soon can leave marks or damage the finish, especially in shaded or thicker-coated areas.
Can I stain my deck during a heatwave?
It’s possible, but it requires extra care. High heat can cause the stain to flash-dry, resulting in streaking and uneven penetration. To avoid problems, apply the stain early in the morning or after the sun has started to set. Working in sections and keeping your materials shaded also helps maintain consistent results.