Skip to content


Learning how to install Trex deck boards the right way sets the stage for a stunning, long-lasting outdoor retreat. It’s about putting boards together with precision, planning smartly, and using quality materials to bring your vision to life. With the right approach, every detail adds up to a space that’s as durable as it is beautiful, ready to enjoy for years to come.
What to Know Before You Install Trex Decking
Before you start your Trex decking project, it’s essential to understand why composite is a great choice compared to wood or PVC. Let’s explore these key points to guarantee a smooth installation process.

Why Choose Trex Decking Over Wood or PVC?
Choosing the right decking material can greatly impact your outdoor space’s aesthetics and functionality. Trex decking offers superior durability, resistance to rot, and low maintenance compared to wood or PVC. When you learn how to install Trex decks, you’ll see its long-lasting beauty. Plus, knowing how to lay Trex decking guarantees a smooth installation process, giving you a stunning deck that stands the test of time.
How to Plan the Perfect Trex Deck Layout for Your Space
Planning the perfect layout for your Trex deck can transform your outdoor space into a functional and inviting area. Start by measuring your available space and considering how you’ll use your deck. Think about traffic flow, seating arrangements, and any features you want, like built-in benches or planters. Sketch your ideas, keeping aesthetics and practicality in mind to create a cohesive design.
What Permits and Building Codes Apply to Trex Deck Installation?
Understanding the necessary permits and building codes is essential when installing your Trex deck. Check with your local building department to find out the specific requirements in your area. You may need a building permit, and there could be zoning regulations or code compliance issues regarding deck height and railing. Ensuring you meet these requirements will help avoid costly delays or fines later on.
What Tools and Materials Do You Need to Install a Trex Deck?
To install Trex deck boards requires thoughtful preparation. The right tools and materials ensure a smooth build, long-term durability, and a polished finish that enhances your outdoor space for years to come.
Essential Tools for Trex Deck Installation
To build a Trex deck efficiently and safely, you’ll need a reliable set of tools. These essentials help ensure accurate cuts, secure fastenings, and a professional-looking result:
- Circular saw – for clean, precise board cuts
- Power drill – to drive screws and fasteners securely
- Measuring tape – for accurate layout and spacing
- Level – to maintain even surfaces and alignment
- Framing square – for checking right angles
- Safety gear – including gloves and goggles for protection
Having these tools on hand sets the stage for a successful installation.
Choosing the Right Deck Frame and Fasteners for Trex Boards
The frame and fasteners you choose directly impact your deck’s strength and longevity. Here’s what to consider:
- Frame material – pressure-treated wood or aluminum for durability
- Fasteners – stainless steel or coated screws to resist corrosion
- Compatibility – ensure fasteners are approved for Trex boards
- Spacing and support – follow recommended joist spacing for structural integrity
- Weather resistance – select materials suited to your climate
A solid frame and proper fasteners help your Trex deck perform well and look great for years to come.
How to Lay Trex Decking Boards Step-by-Step
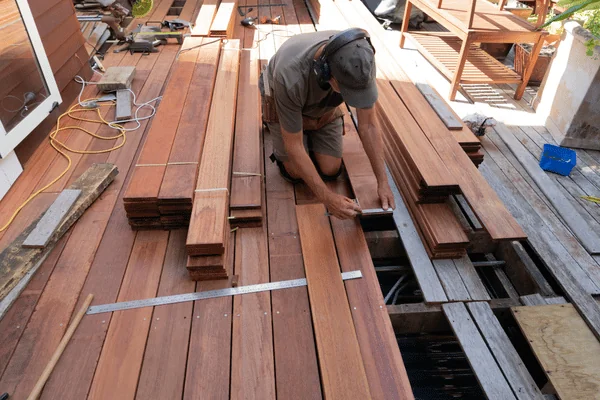
Laying Trex decking boards requires precision, patience, and a clear plan. Each step, from preparing the base to finishing touches, plays a vital role in achieving a durable, attractive outdoor space.
Prepare the Deck Substructure Properly
Start with a level, stable base using pressure-treated lumber or approved framing. Check for damage, reinforce weak areas, and follow spacing guidelines to ensure your substructure supports the decking securely and evenly.
Install the First Trex Deck Board Securely and Accurately
Align the first board flush with the deck edge, ensuring it’s straight and level. Use hidden fasteners or screws, and maintain consistent spacing to allow for expansion and a clean, uniform layout.
Installing Remaining Boards and Trimming for a Clean Finish
Continue laying boards with proper spacing and secure each using recommended fasteners. Once all boards are installed, trim overhangs neatly and sand edges for a smooth, finished appearance that enhances your deck’s look.
How to Install Trex Deck Stairs and Railings Safely
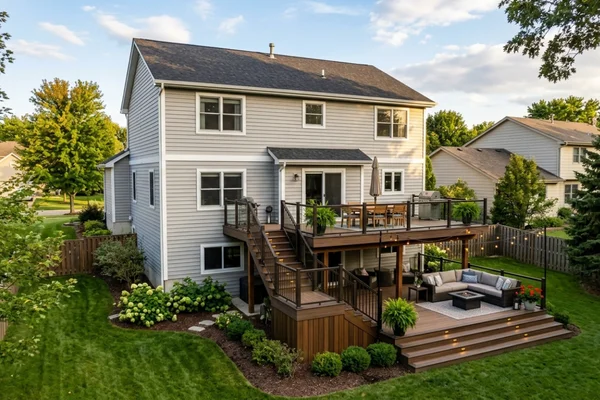
Understanding how to lay Trex decking properly is essential when installing stairs and railings. A safe, code-compliant build depends on precise framing, secure fastening, and thorough inspection, ensuring long-term durability and peace of mind for your outdoor space.
Step-by-Step: Building Trex Decking Stairs
Constructing Trex deck stairs requires precision and planning. A well-built staircase enhances safety and usability while supporting the overall structure.
- Measure rise and run – calculate stair height and depth accurately
- Cut stringers – follow measurements and Trex guidelines
- Secure stringers – attach firmly to the deck frame
- Install treads – ensure each step is level and evenly spaced
- Double-check alignment – confirm consistency across all steps
Installing Trex Railing Systems for Safety and Style
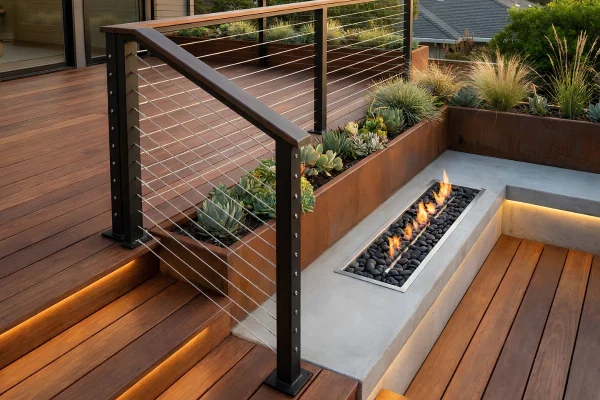
Trex railing systems add both protection and visual appeal. Installing them correctly ensures stability and a polished finish.
- Measure post placement – determine height and spacing
- Install posts securely – anchor at corners and along stair edges
- Attach railing sections – use level to maintain alignment
- Check for movement – tighten connections and reinforce if needed
- Finish with caps or trim – enhance aesthetics and conceal fasteners
Safety Codes and Inspection Tips for Deck Stairs and Rails
Compliance with safety codes is essential for legal approval and long-term security. Inspections help catch issues before they become problems.
- Review local codes – check stair width, rise, and railing height
- Verify alignment – use a level to confirm straight lines
- Secure all components – ensure posts, treads, and rails are tight
- Schedule inspection – have a qualified professional assess your work
- Make adjustments – fix any issues before finalizing the project
Following these steps helps ensure your deck passes inspection and remains safe for everyday use.
Finish and Maintain Your Trex Deck for Long-Lasting Beauty
To guarantee your Trex deck maintains its stunning appearance for years to come, proper finishing and maintenance are essential. Regularly clean the surface with soap and water to remove dirt and debris. Inspect for any signs of wear, and address them promptly. Avoid harsh chemicals, and use a soft-bristle brush when needed. With these simple steps, you’ll make certain your deck remains beautiful and functional.
Common Mistakes to Avoid When You Install Trex Decking
To install Trex decking requires proper knowledge to ensure it can elevate your space to its best. Avoid these common pitfalls to ensure durability, safety, and a polished finish that lasts through seasons and weather changes.
Overlooking Proper Ventilation and Drainage
Ventilation and drainage are vital for deck longevity. Leave space between boards for airflow and install drainage to prevent water buildup. These steps help prevent rot and preserve your deck’s appearance over time.
Incorrect Fastening or Uneven Board Gaps
Improper fastening causes uneven gaps that ruin your deck’s look. Use correct fasteners and spacing tools, and measure carefully. A consistent, seamless layout ensures your Trex deck looks professional and performs well.
Ignoring Temperature and Expansion During Installation
Trex decking expands and contracts with temperature changes. Always leave expansion gaps between boards and fixed structures. This prevents warping, buckling, and long-term damage, keeping your deck functional and visually appealing year-round.
Final Thoughts – Building a Trex Deck That Lasts for Decades

When you invest time and effort into building a Trex deck, it’s essential to guarantee that it stands the test of time. Learning how to install Trex deck boards properly is the foundation for long-term durability. Choose high-quality materials, follow installation guidelines, and maintain it regularly. By doing so, you’ll enjoy a beautiful, resilient outdoor space for decades. Remember, proper planning and execution are key to ensuring your deck remains a lasting centerpiece for your home.
Don’t let installation mistakes ruin your investment. Get professional help from certified Trex installers in your area.
Frequently Asked Questions About How to Install Trex Decking
Curious about how to install a Trex deck correctly? These frequently asked questions cover key tips, techniques, and common concerns.
1. Can I install Trex decking directly over an old wood deck?
Many homeowners wonder if they can install Trex decking directly over an old wood deck. While it’s possible, you should assess the condition of the existing deck first. Confirm it’s structurally sound and free of rot or damage. If the old deck is in good shape, you can proceed, but remember to follow proper installation guidelines for the best results.
2. What’s the ideal joist spacing for Trex decking boards?
Evaluating the condition of your existing deck is important before installing Trex decking. Once you’re ready to move forward, understanding the ideal joist spacing is key to a successful project. For Trex decking boards, the recommended joist spacing is typically 16 inches on center for standard applications. If you’re using heavier boards or specific designs, consider reducing spacing to 12 inches for added support.
3. How long does it take to install a Trex deck?
Installing a Trex deck can take anywhere from a few days to a couple of weeks, depending on various factors. Your timeline will depend on the deck size, complexity, and whether you’re doing it yourself or hiring professionals. If you’re experienced and have the right tools, you might finish quicker, but don’t rush, quality installation guarantees lasting beauty and durability.
4. Do Trex decks need sealing or staining after installation?
After you’ve successfully installed your Trex deck, you might wonder about maintenance requirements. The great news is that Trex decking doesn’t need sealing or staining after installation. It’s designed to resist fading, staining, and mold, making it low-maintenance. Simply cleaning it occasionally with soap and water will keep it looking great for years to come. Enjoy your worry-free outdoor space!
5. How do I clean and maintain my Trex deck over time?
Keeping your Trex deck in top shape over time is straightforward. Regularly sweep away debris and rinse with a hose to prevent dirt buildup. For tougher stains, use a soft-bristle brush and mild soap solution. Avoid harsh chemicals, as they can damage the surface. Inspect your deck periodically for any signs of wear and address them promptly to maintain its beauty.